April 29, 2019

Drilling flap skeleton and skins

The whole week turned out to be too humid to do any priming on the aileron parts, so I decided to start working on the flaps in the meantime. Like the ailerons, putting the flaps together should be a pretty simple task.

To start, the ribs need to be clecoed to the spars and to the lower flap skin to be match drilled. What's interesting here is that all of the internal FL-705 ribs face left on both the left and right flaps while the inboard and outboard ribs are oriented so that the webs face the inboard side.

It looks weird, but it's correct according to the plans.

Since the top skin will overlap the bottom skin on the bottom side of the flaps, there will be a gap between the top skin and the very ends of the inboard/outboard ribs. The plans say to make some shims from a .025 thick sheet of aluminum (the same thickness as the ribs), but I was hesitant to cut into the one sheet that was included in the wing kit since I didn't know what else I would need to use it for.


As it turns out, the practice kit I had worked on months ago that I was currently using as scrap had a perfectly good sheet of .025 aluminum on it, so I cut some off to use for the four shims I needed to make.


After cutting them to size and rounding off the corners I had some perfectly good shims made from aluminum I'd otherwise never have used.

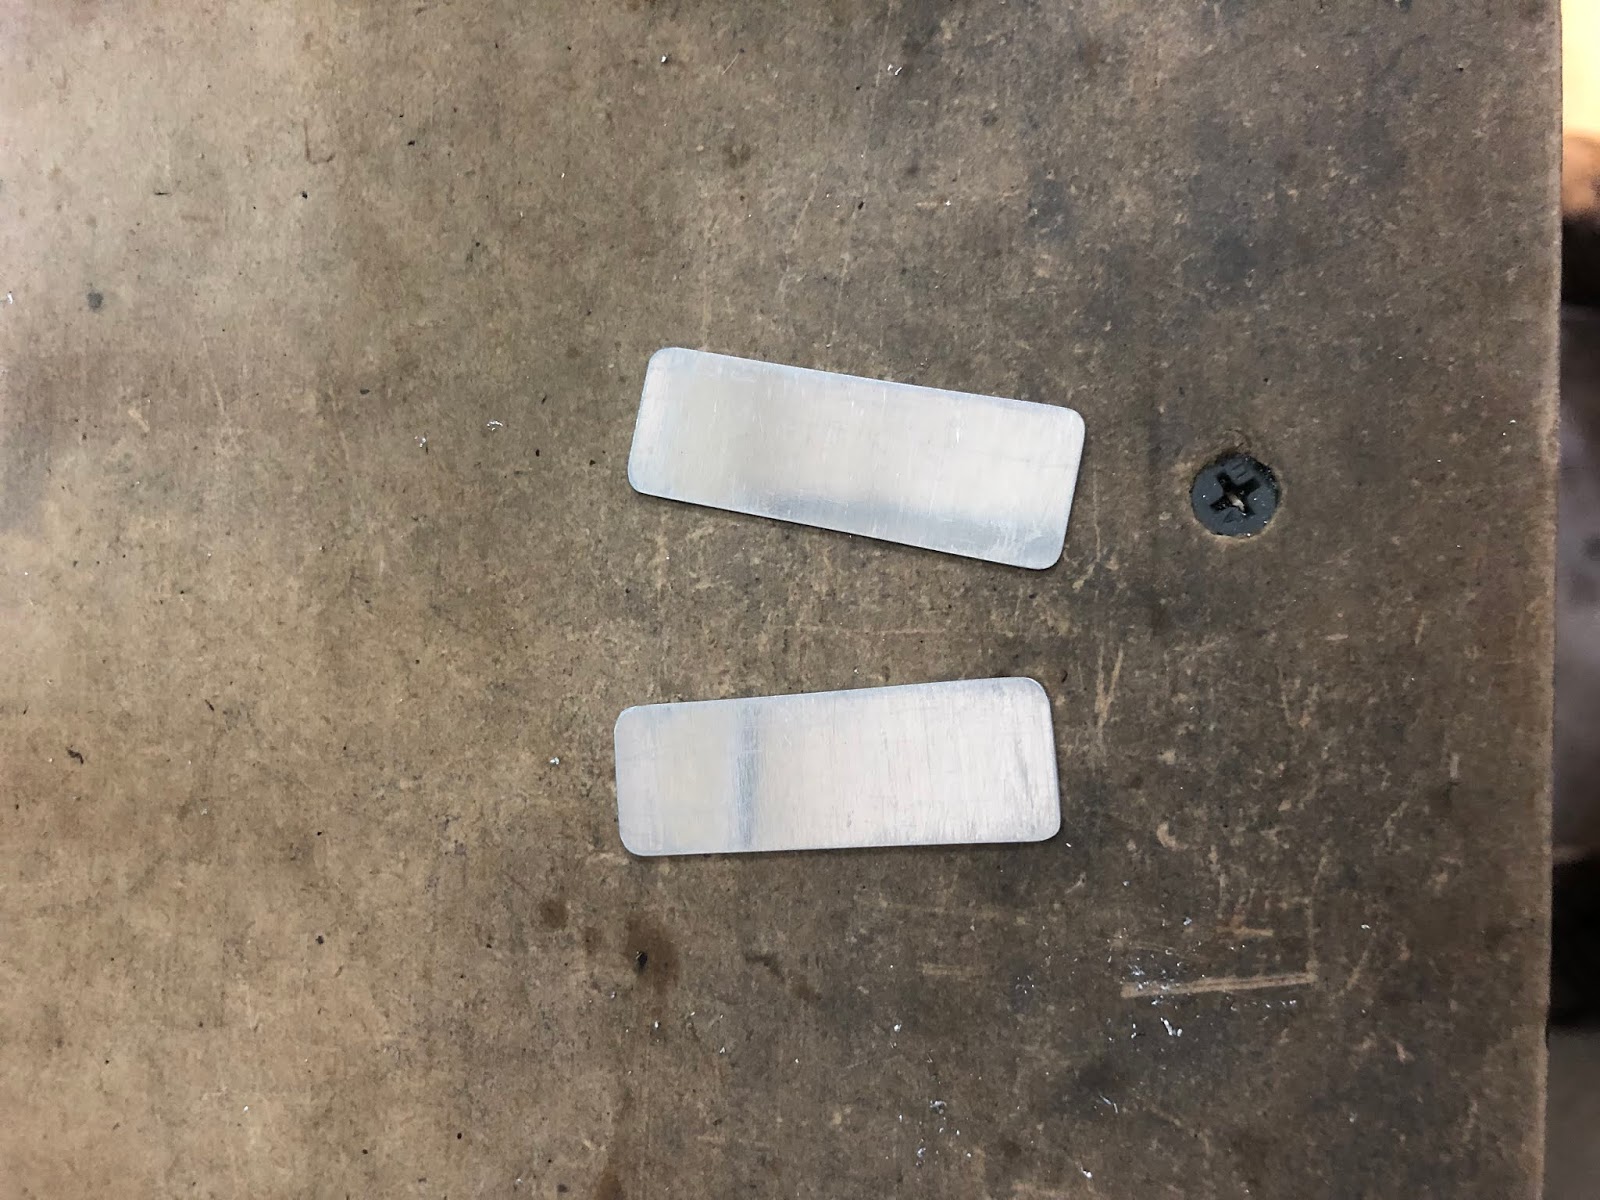
I'll have to match drill these to the inboard and outboard ribs later.

There were a couple of holes the need to be match drilled through the skin and into the ribs. The holes along the rear "spar" formed in the skin weren't difficult to drill, but there were some spaces between the ribs and the spar that will need to be corrected with some more shims.

No shims were needed on the first and fourth ribs since they were already sitting flush...

...but the middle ribs will need a shim here to keep the whole flap from warping when this area is riveted.

The shims needed here didn't have to be as thick as the previous shims, so I cannibalized one of the thinner skins from the practice kit for the material I needed.

These are probably the tiniest parts I've had to fabricate thus far.

Holes drilled...

...and in place. Perfect!

Before putting on the top skins, I worked on the hinges that will attach the flaps to the wings and allow them to move up and down. The hinges come way too long and have no holes in them, so they need to be trimmed to length and match drilled with the skin/spar.

It's been said before, but the empennage really is the training ground for what you'll encounter later on in the build. The process to finish these hinges was exactly the same as it was for the trim tab assembly. I started by drawing a line at 1/4" all the way down the spar to help align the hinge with the flap. Thankfully there is enough space on the larger flaps to clamp the entire hinge in place. What's interesting is that having the holes aligned with this line causes the hinge to be flush with the enge of the skin/spar. 

Perfectly aligned.
With the hinge meticulously clamped in place, I started at one end and carefully worked my way down. I had a system of putting in multiple clamps ahead of the next few holes so I would only have to remove a clamp instead of moving it one space over every time I move to a new hole. Eventually I had the entire hinge clecoed in place.


After trimming it to the right length I reinserted the hinge pin to get a feel for how it will look when it's ready to install on the wing.


On went the top skin so it could be drilled to the skeleton. The plans specifically state to align and drill the ribs on the top of the flap before drilling the lower "spar" where the top skin connects to the bottom skin. Since there's a lot of spring in the bend of the top skin this is probably to prevent drilling the parts with a twist. I left the bottom spar unclecoed while I drilled the top ribs and main spar, then clecoed the rear spar and drilled it.


Even without a level I can tell that there's pretty much no twist in these parts at all after drilling, so it looks like I did a good job!

April 22, 2019

Drilling and deburring aileron parts

There was a wide variety of holes that needed to be drilled and match drilled before the ailerons could be put together. First up was the doubler plates, meant to increase strength in the area around each end of each spar where the hinge brackets will connect to the wings.

Pieces temporarily in place.

There's a plethora of different sized holes to be drilled here, so I spent a long time trying to fully understand how everything would connect and which size rivets would go where.

Learning from my past mistakes, I probably spent 30 minutes staring at this diagram before I started drilling anything.

After a while I finally had the answers I needed.

Eventually I figured everything out and prepared to drill. The doubler plates needed to be centered on the spars so I drew a line down the middle of each to make sure things were lined up. I clamped them in place and drilled the various holes in each.


The holes in the hinge brackets weren't drilled to #12, so I enlarged them to #30 before taking the much larger #12 bit to them to make for an easier transition.

Bolts in place. I don't know for sure, but my guess is that bolts are used here for their larger diameter and thus greater strength compared to rivets. Setting rivets of this size would be challenging with just a hand squeezer!

With these all done I clecoed the ribs in place on either end and attached the forward skin for match drilling.

Ooh, this looks neat!

The roundish ribs on each end that will hold the counterbalance pipe in place have two holes each that must be match drilled to the skin.


I then needed to match drill the holes in the end ribs that attach the aft skins. The inboard ribs were easy to drill since there is so much space in this area, but the forward skin interfered with the drill when trying to drill the outboard ribs. I ended up having to disassemble everything just to drill the four holes into each outboard rib.

If I had a super long #12 bit I might have been able to make this work, but oh well.

The only drilling left to do at this point was drilling the aft skins and the counterbalance pipes, so I clecoed everything together and marveled at my new ailerons.

Nice!

Drilling the steel counterbalance pipes requires a sharp drill bit, a fast drill, and lots of cutting oil. Luckily I had all three, but it still took a good 30 seconds to a minute to drill each hole. The most difficult part of the whole process was making sure the drill bit stayed perpendicular to the pipe under the skin.

Between the cutting oil and the metal shavings, this got messy.

By the time I had finished drilling both pipes I had gone through two #30 drill bits. Galvanized steel dulls bits quickly even with sufficient lubrication!

This took a while. Note the cardboard showing what perpendicular to the pipe looks like.

The leading edge is where most of the holes for attaching the pipe are needed, but there are two aft holes that attach the pipe to the round end ribs. Drilling these took some creativity with a long #30 drill bit.

I found out after I had drilled everything that this is the exact method recommended in the plans. Good thing I got it right!

It was at this point I noticed that the skin was bulging a bit between clecos because of how springy it is.


I tried putting clecos in every hole just to make sure that things would smooth out, and thankfully they mostly did. I'm still going to use the edge forming tool on these to make sure things stay flush after riveting.


For match drilling the main spar the top holes are reamed to #40 as per usual, but the bottom ones are enlarged to #30 for CS4-4 blind rivets since there's no way to buck or squeeze rivets here after everything is closed up. Drilling every other hole to #30 made for a nice picture with the clecos in place before I drilled the rest.

Artsy.

Just for fun, I removed any remaining blue vinyl from the parts and clecoed the entire assembly together, hinge brackets and all.

Shiny!

With the fun part out of the way it was once again time to spend a few hours deburring things. Cleaning up the edges of spars and ribs isn't fun, but doing things like rounding off corners on doubler plates can be pretty satisfying.

It's parts like this that make for a nice contrast from raw material to finished airplane part.

April 18, 2019

Riveting aileron stiffeners to skins and bending the trailing edges

With the skins and stiffeners primed I went ahead and dimpled them both. Since the primer dries fairly quickly I let the parts sit overnight and started dimpling around 15 or so hours after I had finished priming them. The stiffeners had no problems at all, but some of the holes on the right aileron skin actually had some primer flake off when being dimpled. I probably should have waited the recommended 48 hours for the parts to fully cure before dimpling.


I took the opportunity to practice spot priming by mixing up a couple milliliters of primer and dabbing it on with a q-tip. It worked decently well and doesn't look too bad for something that will be completely unnoticeable anyway. I'll have to do this to the main spars once I machine countersink the holes in those.


I backriveted the stiffeners to the skins in much the same way as I did with the elevators. I had taken the plastic cuff off of the backrivet set to make setting the rivets on the rudder trailing edge easier. Unfortunately this means I have to use my fingers to hold the parts flat against the skins, which also means I end up with bruises on my fingertips where the set hits them a few dozen times a second.


Out came the bending tool and I bent the skins as far as they could go. 

Before...

...and after.

This still wasn't quite enough to complete the bend though.

Yeah... the skin should be touching that spar. Oh well, time to break out the hand seamer.

I took to the skins with the hand seamer and managed to get the trailing edges pretty close to their final bend. The left aileron is pretty much where it needs to be, but I ended up overbending the right aileron a bit (which is very easy to do when using the hand seamer). Like the elevators, they can be easily adjusted later if needed even after everything is riveted together.

There we go.

The left aileron. Damn near perfect if you ask me!

April 15, 2019

Priming aileron skins and stiffeners

I spent a good five hours in the garage scuffing, soaping, rinsing, acetoning, and priming the aileron skins and their stiffeners, which is actually less time than I spent doing the same for the elevator skins and stiffeners. Perhaps I'm getting faster now that I have the process down?

I always wear these novelty shirts when I'm working in the shop since I'd probably never wear them otherwise.

April 11, 2019

Starting the wings! Trimming aileron stiffeners, match drilling and deburring aileron skins

After three months of the parts just sitting there, it's finally time to start working on the wings! In preparation for working on the bigger pieces in this kit I went ahead and cleaned and reorganized the shop. My tables are now side by side instead of being angled to support the entire length of the spars.

Ready to go!

Initially I followed the instructions and started with the main spars. The first task here is to inspect the spars and prepare to countersink a few hundred holes to allow for the installation of platenuts that will eventually attach the fuel tank skins to the spars. I inspected the spars and gave them some labels, but after reading ahead in the plans I decided to hold off on working on the spars for now. I haven't yet built any kind of wing stand and space is limited as is, so I'm going to start with the smaller ailerons and flaps since they'll take less time and be easier to store.


Building the control surfaces is similar to the elevators and rudder, so this was a good way to ease into things on the wings. The ailerons are up first, and just like the elevators the process starts with fabricating some stiffeners. The stiffeners again come in long pieces that must be trimmed apart then trimmed and smoothed to their final shape. 

Hoo boy, hours and hours of work starts now.

Raw stiffeners. Looking at these almost fills me with dread knowing how long they'll take to finish...

Thankfully the stiffeners are just about the perfect length to cut on my bandsaw. No need to use the shears and warp any metal.


The final shape of these stiffeners is slightly different from that of the elevators and rudder since the ailerons are thinner control surfaces, but the process of marking and cutting from notch to notch is exactly the same.

Marked...

Cut...

...and smoothed. This is a good before and after comparison.

Unsurprisingly these took a long time to finish. Each of the 32 stiffeners takes around 15-20 minutes of work to finish, so I was in the shop for a good 10 hours.

Seeing these all of these finished in a row is so satisfying.

With the stiffeners smoothed I could match drill them to the aileron skins. It feels good to finally take them down from the shelf on which they've been hiding.


Once again the process is exactly the same as match drilling the stiffeners for the elevators.


The only difference from the elevators is that here all of the stiffeners are the same length, so labeling where each stiffener was drilled is extremely important to ensure things line up when it's time to rivet. The system I came up with was to label each stiffener based on whether it was on the (L)eft or (R)ight aileron, the (u)pper or (l)ower side of the skin, and which position it's in down the line starting at the inboard side (1-8). For example, the third from the inside stiffener on the upper left aileron skin would be the "Lu3" stiffener.

I did have a small issue arise when I discovered that each skin actually has a designated top and bottom side. Apparently the bottom side is the one that has some closely-spaced holes near the middle:

Lesson learned: read EVERYTHING before you start.

I had already finished match drilling everything at this point so I checked to see whether I had messed anything up. The right aileron was oriented correctly, but the labels on the left aileron are actually inverted. This won't really be an issue since everything is symmetrical, so as long as I rivet everything according to the labels I've already made then I'll be fine.

A small modification to make this label slightly less inaccurate. ;)

The last task for now is to deburr everything, another hours-long process. I had deburred the stiffeners as I took them off the ailerons and I had already deburred the insides of the holes in the skins, but to get to the outsides of the holes and the edges of the skins I needed to remove the blue vinyl. Out came the soldering iron.

I'm getting pretty good at this!

The corners of the skins were a bit sharp, so I rounded them off with a file after smoothing the edges of the skins.


A little more deburring later and the skins and stiffeners are ready to be primed.