At last, I'm at the beginning of the final subassembly of the empennage kit. The trim tab is small, but a lot of work goes into completing it and getting it installed on the left elevator.
At first I considered priming the trim tab parts, but I decided against it. I had a limited amount of time to prime the parts before the next round of storms and humidity rolls in, and I still had to deburr everything (a 1 to 2 hour job by itself) before even starting to prepare the parts for priming. My goal was to finish the empennage and start on the wings by the end of March, so there was no way I'd be able to get the trim tab done by then if I spent a lot of time priming it. Besides, the trim tab is cheap and easy to replace if it ever does get corroded.
Work begins by bending the skin to fit its spar. On the large bender, the smaller tab is unsurprisingly a lot easier to work with than the elevator skins.
 |
| Almost there... |
 |
| Perfect! |
Step 2 is to bend the inboard and outboard tabs much like those on the left elevator skin. The smaller bending block I used for the inside of the elevator skin would work fine on the shorter outboard tabs, but the longer inboard tabs would need a longer block to bend the whole tab at once.
The larger block I had used for the outside of the elevator skin was long enough to do the job, but it would need to go on a diet before it could fit all the way into the skin.
 |
| Just a little too thick for this application... |
A quick slice with the bandsaw and a round of sanding later, the block fit into place. I stuck the all-important double-sided tape on the blocks and clamped the tab to the workbench, then went at it with a block of wood.
 |
| A much better fit than before. |
 |
| A good start... |
 |
| ...and this was as far as the wood block would bend it. |
Finishing the bends with the rivet gun left a slight waviness like on the left elevator skin, but it's purely aesthetic and shouldn't affect the functionality of the trim tab itself.
 |
| Looks meh, but will probably function just fine. |
The smaller tabs turned out much better with a much straighter crease on each side.
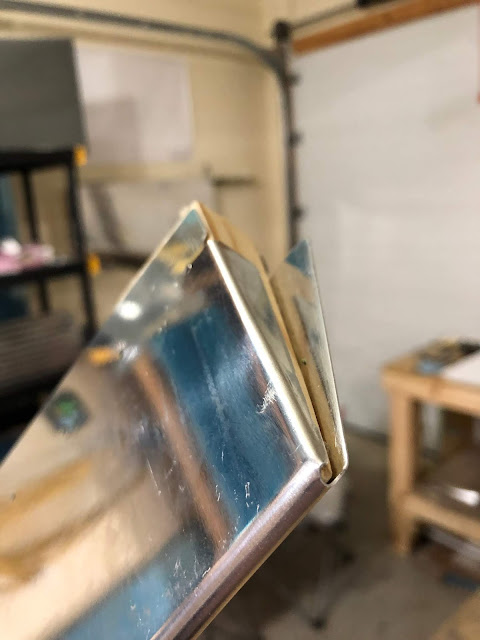 |
| My best bend to date. |
Thus ended the saga of bending tabs. I didn't get terrible results, but I side with many other builders in that I wish Van's would redesign this piece to have riblets instead of making people bend the tabs. Weight is likely a consideration since the extra ribs and rivets would add maybe an ounce or two of weight, but the results would be far more consistent. Not to mention that the trim tabs on most certified aircraft seem to use ribs. If I end up doing another trim tab for whatever reason then I'll probably go the riblet route and skip this mess entirely.

The final task of the night was match drilling the appropriate holes. When searching for the horns that will connect the trim tab to the servo in the elevator I discovered that I had a pair of very similar parts. The plans and the associated diagram mention removing half of the E-717 and E-718 horns when using the electric trim instead of the manual trim, but there are two horns included in the electric trim subkit that are already trimmed to size.
I clamped the horns in place and match drilled everything to the skin. Those aftmost rivets are going to be a chore to set.


