December 31, 2019

A whole lotta wing rib work

Well, it's been a while.

I've learned that building tends to slow down for me this time of year thanks to all of the other things to which I need to devote my time.

The last few months have been especially eventful at work, with some of my major projects including:

Redesigning the flight school's website...

Out with the old...

...in with the cool.

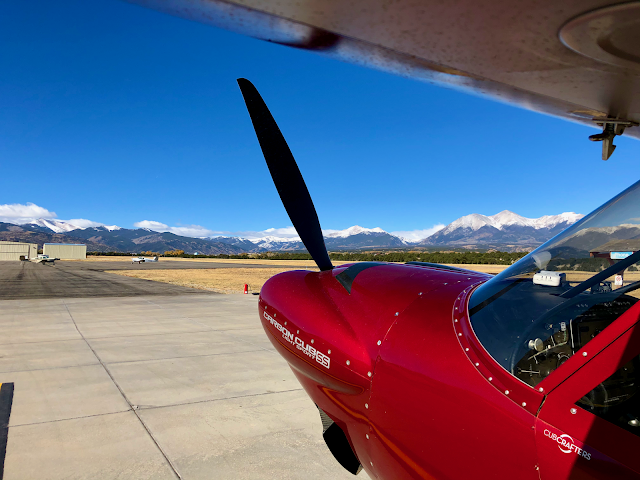
Ferrying a Carbon Cub from Aspen, CO back to Arkansas on what was the longest cross country flight I've taken thus far...


Helping start our flight school's new backcountry flying course...


And being put in charge of our new simulator...


The whole time, I chipped away at deburring all of the wings' main and nose ribs any chance I could get. With a combined 52 ribs (a mixture of main ribs, leading edge ribs, and fuel tank ribs) to prepare, it took a long time to work my way through the pile of parts.

Aside from finishing the edges, I had to make sure the ribs were actually straight before they could be installed on the spars. When the ribs are formed on their press at the factory the flanges and the webs tend to bow, so my next order of business was getting everything within spec. To straighten the flanges I put together a tool made out of some spare MDF, 2x4s, aluminum bars, and an oak handle.


It's easy to use - simply work around the edges of each rib, check for straightness, then move on to the next one.


...and it seems to do the trick!

September 16, 2019

Rear spars (almost) complete! Riveting the rear spars

My rear spars are done! Well, almost.

Before I riveted anything I made sure to dimple the aileron bracket doublers and the holes in the spar flanges that any of the spar doublers would be covering. I maybe could have dimpled these holes later but it would have been difficult with the doublers in the way.


About the only things that I have left to attach to the rear spars are the aileron brackets and the aileron and flap gap braces. Those will come later once I'm done with the rest of the main wing structures, so for now I'm calling the rear spars done!

It's time to move on to everyone's absolute, undisputed favorite part of the wing kit, the wing ribs!

September 9, 2019

Priming rear spar parts and tiedown brackets

I took care of priming all the parts for the rear spar as well as the tiedown brackets so I could finally finish putting them all together. The rear spars are easily the most cumbersome parts I've had to prime due to their sheer size. I'll need to get creative to prime the wing skins...


September 8, 2019

Final rear spar work before priming

The areas on the rear spar where the aileron brackets will be mounted have been know to develop cracks on older RV-7 kits, so the newest kits include blank doubler plates that need to be match drilled and riveted to the spars to keep things strong. Probably a good thing.

I did my best to center each plate with its corresponding rivet holes, clamped each plate flush with the spar, then match drilled each one.


The hole where the aileron pushrod goes through the spar of course needs to be cut into the doubler plate to match, lest I try to fly an airplane with no ailerons. I started by tracing the cutout onto the doubler with a sharpie then drilling a #30 hole into the plate as close to the center of the cutout as I could. My plan was to use the step drill to gradually enlarge the hole then use the dremel to finish it off.


At this point the unibit was too big to keep going with it, so I switched to using a dremel tool with a cutoff wheel to remove most of the rest of the material.

It looks messy as heck, but trust me, it gets better!

To finish each cutout I switched the cutoff wheel for a sanding bit to file and smooth the cutout to its final size. The results speak for themselves:


Clean!

August 19, 2019

Final main spar countersinking, priming, and nutplates

My new countersink bits arrived so I could continue working on the main spars. The new bits obviously made for faster, cleaner cuts than the old bits. Once the cutting was done I spot primed everything and allowed it to cure for a couple hours.

In the meantime I was able to countersink and spot prime the holes for the nutplates on the forward side of the main spars.


After the primer cured, squeezing the flush rivets was a five-minute job.


With the primer for the main nutplates cured I installed the nutplates and then countersunk and primed the final holes for the screws.

FINALLY done. Glad that's over.

As much as I hate to admit it, I'm actually not finished with all of the countersinking on these things. I'll still have to countersink ALL of the #40 holes to allow the dimpled wing skins to sit flush with he spar. It'll probably be a while until I need to do that though, so I'll revel in this victory for the time being.

With that the main spars are (almost) officially done, though I have a LOT of work to do before I get to the final assembly. The next big tasks are finishing the rear spars preparing the ribs, so I have plenty to look forward to in the coming months.

August 12, 2019

Fabricating tiedowns, starting work on the rear wing spars

The last job to get done on the main spars before moving on to the rest of the wings is fabricating the wing tiedown attach points since I'd prefer to keep my airplane from blowing away in any kind of strong winds.

The tiedown brackets themselves are supposed to be tapped to allow the tiedown rings to be screwed in, but I don't own a tap and have little desire to buy one for this small job. Instead, I ordered some tiedown blocks that are pre-tapped from Cleaveland. They're literally the exact same piece as what's provided by Van's, just with the holes tapped so I don't have to do it myself. Worth the extra cost in my opinion.

To fit the tiedown blocks to the spar I needed to fabricate some spacers to support the blocks. These are all cut from a single aluminum bar.


Once cut to size, the pieces can have lightening holes drilled into them. I don't know how much weight this really saves, but I didn't see any reason to not do so.

I drilled a pilot hole in the center of each block, then used my unibit to slowly remove most of the material. The hole is meant to be a full inch across according to the plans, so my 3/4" bit wasn't going to be enough.

The bit I have now doesn't quite.... cut it. Get it? :D

In the meantime I taped the spacers in place to keep them secure during drilling, and I clamped on the tiedown blocks so I could match drill everything to the spar. On the forums there are a few reports of issues where the tiedown blocks weren't close enough to the skin the allow the tiedown rings to fully screw into place without having some sort of spacer installed between the blocks and the inside of the skin. To avoid this, I took a flat piece of scrap aluminum and used it to place the tiedown block flush against where the bottom wing skin will sit on the spar.

Spacers taped in place. The blue aluminum piece is where the bottom wing skin will be.

Tiedown block clamped and starting to drill. I'll definitely need to round the corners where the block will contact the bottom skin to avoid any bumps or cracks.

...and fully drilled. Nice!

With the holes all match drilled to the spar, I just needed to match drill for nutplates that will attach the spacers to the tiedown blocks and will also attach the entire tiedown assemblies to the spars. Clamping the nutplates to the blocks and match drilling them was easy enough.

Screwing a bolt into the nutplate made it easy to maneuver it into place while keeping it centered.

The spacers were then clamped to the tiedown blocks and nutplate holes match-drilled into the spacers. With all of that drilling out of the way, a quick trip to Harbor Freight yielded a nice 1 3/8" unibit, which did a wonderful job of finishing the holes in the spacers to final size.


There will be flush rivets attaching the spacers to the blocks, so I machine countersunk the spacers for the rivets. A quick deburring later and the parts are ready for priming.


Time to start work on the rear wing spars too. The inboard attach points are some thick doubler plates (2 per wing) that for some reason need to be trimmed for the RV-7. My only guess is that the 7's wings are attached slightly lower and closer to the fuselage than the RV-8's wings, so the ends have to be shaped to fit.

Taking extra care to get the marks as close to the plans as possible, I sharpied the cut lines onto the doubler plates and used the bandsaw to make the initial cuts.


From there I took all four pieces to the scotchbrite wheel to deburr and break the edges. Soon I'll be rounding all the corners and shaping the pieces to exactly match one another once they're installed on the spars.

August 10, 2019

Countersinking, priming, and installing nutplates in the main spars

Oh boy oh boy, it's time to start the wings proper! The main spars already have a lot of work done on them from the factory. The doublers have already been attached to the main spar channel using the larger 3/16" rivets that would be difficult for homebuilders to set without a heavy duty squeezer or rivet gun, and the whole thing has been gold anodized for corrosion protection. That said, the spars still have a decent amount of prep work before they're ready to have more parts attached to them.

The fuel tanks will be attached to the wings with screws rather than rivets, so nutplates need to be added to the spars to provide attachment points. Adding these nutplates is a process that really embodies the sheer tedium involved in building an airplane. For the total of 120 fuel tank nutplates on the spars, one has to go down the line of 90 holes on each side of each spar (three holes per nutplate) six times performing a different operation each time.

The process is as follows:

1) Ream all the #40 holes that will attach the nutplates to the spar since the countersink bit won't fit unless these holes are opened to final size. I followed the example set by other builders and put tape over all the gaps on the top side of the spars to keep metal shavings from getting caught between the pieces and causing problems.


2) Countersink the #40 holes to allow the AN426 rivets to sit flush. This was easily accomplished with the Sioux air drill on loan from my good buddy Chip at the airport. The holes didn't need to be too deep since I just need the rivets to sit flush with the spar (there won't be any skins sitting in these holes), but I still needed to make sure to allow some room for a thin layer of primer in each hole.


3) Mix up some primer and spot prime the countersunk holes with a Q-tip to protect against corrosion since the anodization has been removed. I had a tiny syringe left over from my cat's flea and tick treatment that worked perfectly for measuring out small amounts of base and curing solution.

Initially I only primed the holes for two nutplates to test whether I had set the countersink bit deep enough for the rivets to still sit flush. They ended up being good enough for these two nutplates, but I set the cage to cut couple clicks deeper just to be safe.

4) Once the primer is cured (I only waited an hour or two - it was a really thin layer), rivet the nutplates to the spar. The six inboard nutplates are angled to accommodate the additional wing walk ribs. The aftmost rivets on these are easy to squeeze, but the forwardmost rivets are too close to the spar for the squeezer and have to be bucked instead. The rest of the nutplates are parallel with the spar and can be set easily with the squeezer.


5) Countersink the screw holes with a #30 countersink bit. This is done after installing the nutplates to allow the bit to center in the nutplate. These holes will need to be deep enough for the tank skins to sit flush with the spar, so I made a little gauge to check the depth. A lot more material is removed while countersinking these, so these took a lot longer than the last ones.


6) Spot prime the freshly-countersunk screw holes and allow them to cure. I also spot primed some small scratches I had made in the spar while countersinking everything else.


Once the primer is cured, repeat for each side of each spar. For each side, the whole process took roughly 4 to 5 hours.

In addition to the fuel tank attach nutplates are nutplates that will secure inspection panels on the bottoms of the wings. These are slightly smaller K1000-06 nutplates (#6 screws) instead of K1100-08 nutplates (#8 screws), but installation is pretty much identical.


Over the course of a few days I managed to get all of the fuel tank and inspection panel nutplates installed on both spars, and all of the fuel tank attach holes for the right spar are countersunk and primed. I began noticing it was taking an awfully long time to countersink the holes for the left spar, meaning the countersink bits are probably pretty dull by now. I went ahead and ordered new #30 and #40 bits and I'll continue work on the spars once I get them.

Dassa lotta nutplates.

July 26, 2019

Flaps complete! AirVenture 2019 and riveting the left flap

The left flap started coming together just before I left for Wisconsin, but of course the project had to be put on hold until after AirVenture. This year was my fourth visit to Oshkosh, but it was the first year I was able to fly in. I managed to snag our flying club's newest 182 with the reasoning that the newly overhauled engine needed to be broken in anyway, so a long cross country would be the perfect opportunity to get it done.

We watched the Mooney mass arrival launch out of Madison, then we managed to get parked next to them in the North 40!

This year was the first that I was attending as an airplane builder rather than as a prospective builder, so my perspective was a little different as I wandered around talking to exhibitors. I'm still not quite at the point where I'm ready to start ordering things like lights, avionics, an engine, et cetera, but it was nice seeing the latest stuff everyone has to offer. For avionics especially, I'll have a better selection the longer I wait.

At the Van's booth was the usual assortment of factory demonstrators, namely the RV-12iS, the RV-10 with its new panel, and the RV-14. The main attraction (for this year only!) was the newly restored RV-5, the only one of its kind.

We arrived on Sunday before most exhibitors had completely set things up. I managed to catch the crew unloading the RV-5 from its trailer.

That cowling is definitely a custom fit for the two-stroke Rotax engine.

This thing is kinda cool. Van's will never make kits for it, but it'll be nice to see it fly again.


Once I got back home, I finished putting the left flap together. I managed to clean off more of the shelves in the garage so I could use them for plane parts, meaning both flaps could be stored next to the ailerons.


This is another milestone - all of the control surfaces are done! Next it's onto the main wing spars. I'm about to have a LOT of countersinking and nutplates to deal with...